I've been wondering with searching do I need to put both variations of a word. As in; jewelry vs. jewellry. I know it works with Google but with Etsy and other craft sites I'm unsure. Anyway onward to the actual point of the post.
So, being a purely polymer clay jeweller up until recently, I decided to try using resin. Polyester resin, to be precise. Of course, sufficiently paranoid, I did extensive research first and bought my mask that is apparently suitable for toxic waste, but in all honestly still looks suspiciously flimsy for something that is supposed to protect my lungs, and eye protection goggles that were already in the house. Of course my first attempt was a disaster of disorganisation, as per usual. I used polyester resin, notiorious for its noxious smell. Anything you've heard is true. I'm usually not that over-sensitive to bad smells compared to other in the first place, but I admit chemicals do get to me, and it was extremely strong. It will almost certainly impede your ability to work even if you want to risk your lungs. However, the mask, however flimsy, did it's job and I felt fine afterwards.
Of course, I misjudged drying times, spilled half-dried globule of it onto a wood table and caused irreperable damage, got it all over the rubber gloves I was using making them impossibly sticky, stiff and unusable, ended up having to take them off anyway, got it on my hands, oil paint and pigments for coloring everywhere, blobs of resin and paint on the ground, one patch sticking to my shoes as I tried to clean up an other (with a paper towel, that also ended up getting stuck to the ground, yes I'm a wizard at this, I know) on the table, on my clothes....
Protip: don't try to mix in a colour with the resin in the mould. Do it before. Use a small container for each colour you want to use. I learned the hard way. If you are a messy person in the fisrst place you need to be orginised to military precision to use this stuff.
I used some silicone putty (I'll post more about that later) shell mold I had made and a couple of round and oval cab moulds from the same stuff. They didn't dry particularly well either. I thought it was the silicone because I'd heard reports of it not drying properly but I did ensure the manufacturers stated this particular stuff was ok for polyester resin. Another tip is avoid humidity at all costs. Apparently shoving them in the oven will force-cure polyester resin as a last resort, but it wasn't something I tried. I put them in a dry cupboard and after about five days(!) they seemed completely dry. They weren't exacly pretty looking things from my colour mixing debacle but at least they cured.
I have tried it again since, with significantly less disastrous results, which I'll outline in a future post.
I bought my resin from here on ebay.
An amazing, witty title is typed here. No, really.
Saturday, December 31, 2011
Tuesday, October 25, 2011
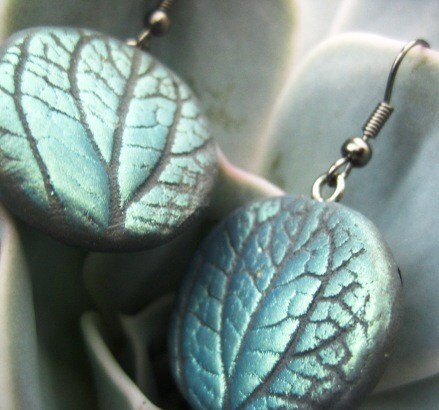
More leaf earrings
Labels:
blue,
dangle,
design,
earrings,
green,
handmade,
jewellery,
jewelry,
leaf,
leaves,
pearl-ex pigments,
polymer clay,
silver
Sunday, October 2, 2011
Leaf Pattern Earrings
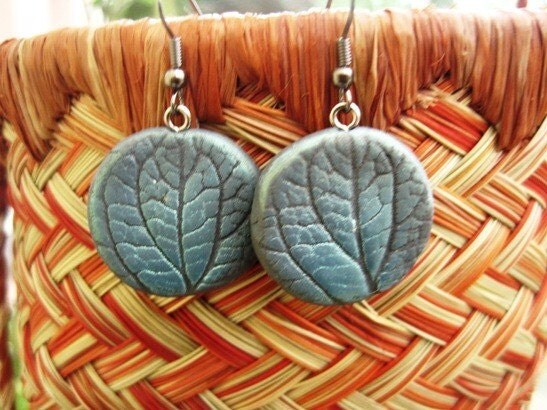
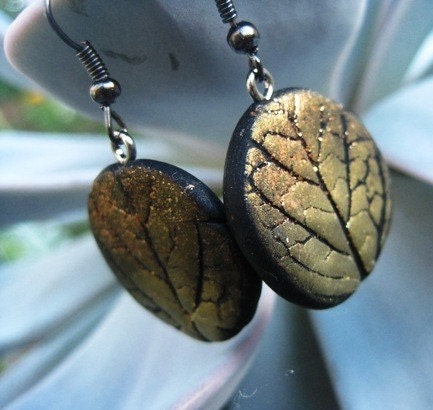
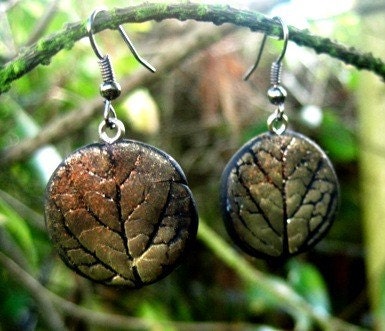 With these I really wanted to emphasise the texture rather than just creating leaf-shaped earrings with leaves pressed into them. I think I used a tomato leaf for these, the veins have to be prominent enough in the leaf to make a decent impression in the clay.
 The round shape was pressed halfway to the desired flatness and then I pressed the leaf into the clay to create the texture. They are coloured with pigments. To get a smooth application of pigment without having it fall into the grooves of the impressed texture, I found using my finger was actually best.
When I tried this method with a brush, it just ended up muddying up the texture of the surface with bristle strokes and having the pigment dust fall where I didn't want it. I got a minimal amount of pigment on my finger and smoothed it over the top until it had that smooth metallic look I was going for. Then I cured them and attached them to ear wires.
Labels:
art,
artwork,
autumn,
black,
etsy,
gold,
handmade,
leaf,
leaves,
pearl-ex pigments,
polymer clay,
texture
Monday, September 12, 2011
Lumiere Paints
I love Jaquard Lumiere paints, they give a dazzling shimmr to anything you might want to paint. I have tried to imitate them mixing acrylic metallics with colours to duplicate their range of amazing shades but it's not really the same. I don't know what they put in these paints to give it that luminescent glow but I love it. A perfect addition to my sparkle addiction when making jewelry. Their gold and pewter metallics I have give the richness of real metal to something I paint it. I used them to paint this polymer clay rose ring combined with purple acrylic. This isn't available now (gave it away as a gift) but I'm planning on many more in similar style to sell on Etsy.
I only have the exciter pack at the moment, but since they've lasted so amazingly well with their great covering power and high pigmentation, I've been eyeing up buying the full set of 32 full size jars from Dick Blick. I like that Blick have reasonable prices to send things to Ireland. I think it cost me 30-somethign dollars to ship for a large order last time. I've encountered such craziness as over 100 dollars to ship supplies that cost under half that and couldn't possibly be that heavy on Ebay. If you're going to shove half the price of the item into the shipping cost at least be a little more subtle when dividing up the cost.
Labels:
acrylic,
art,
costs,
craft,
dick blick,
etsy,
fimo,
handmade,
handpainted,
jacquard,
lumiere,
metallics,
paints,
polymer clay,
reccomended,
ring,
rose,
shipping,
supplies
Saturday, June 25, 2011
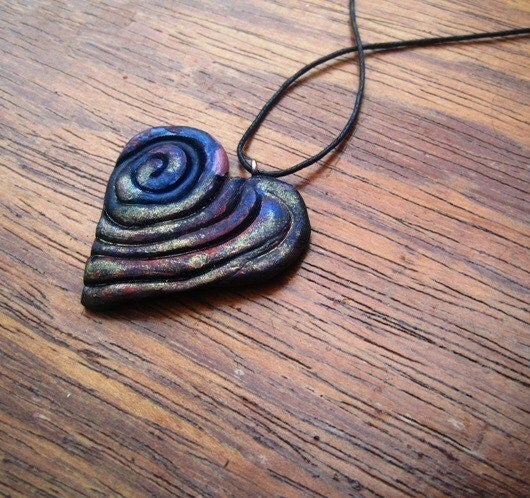
Heart Spiral Pendant
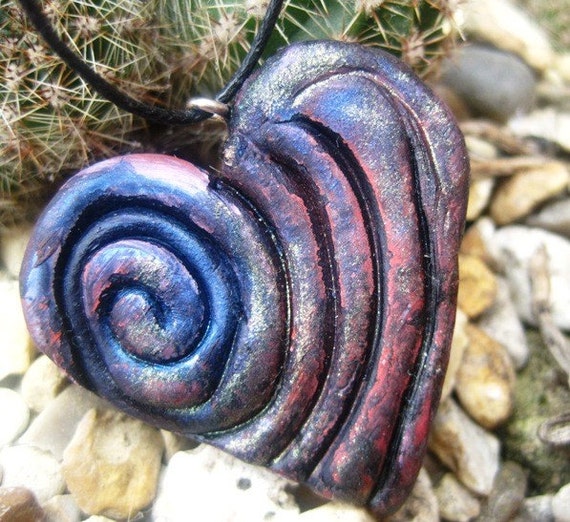
It was quite simply made but I was pleased with how it turned out.
I made a long piece of polymer clay and then rolled it into a round spiral. I made sure it was firmly stuck togther by brushing a small amount of zest-it solvent on the edges. I then gently (just in case it came apart) cut out the heart shape. I cured it before applying any colour to it.
Red and blue acrylic ink were applied liberally to the surface, it kind of settled in the grooves of the spiral, highlighting the design while leaving a lighter shade on the raise parts. I gave another coat this time mixing in some gold Pearl-ex pigments which when dried remained sparkling on the surface. I hope I'm describing this clearly, I wish I'd taken pictures. I've already made something else with this technique and will probably post some kind of step-by-step in the future.
Monday, May 23, 2011
Shard Pendant
Hand painted shard pendant. This one took a while. I rolled out the black polymer clay, but had to make sure it remained thick enough to insert the screw bail that the cord was going to go through. I cut it into an irregular 'shard' shape. Then I painted it with metallic lumiere paints, the bright turquoise, and gold with a little of turquoise mixed in to give a green tinge to it. I'll probably make a lot more of these as I was pleased with the result and try more with just plain pendants and utilising painting designs onto the clay rather than making the paint integral to the piece.
For sale on Etsy
Labels:
art,
etsy,
fimo,
handmade,
handpainted,
lumiere,
metallics,
necklace,
paints,
pendant,
polymer clay
Subscribe to:
Comments (Atom)


